
I received many messages or tweets, Sir, How can I setup my Facebook Privacy Setting to secure my account and also secure my posts, images, and any other important kinds of stuff. So, if you want to secure your account then this tutorial is for you, I hope you like it.
In this tutorial, I’m going to describe you everything you need to know about managing privacy settings on Facebook. Let’s begin…
First I’m going to describe how you can customize your global privacy settings after that I am going to describe to some tweaks that you can do with an individual user that you may be friends with Facebook.
For access your global Privacy setting, you need to go to the top right corner of your screen and click on the drop down menu that looks like upside down triangle from the drop down menu. Now you need to go on setting. After that, you are on setting page. Now you need to go to Privacy and click on it.
Now you are on Privacy Setting, here you can see a couple of different locations here that deal with privacy. Now we have got the privacy tab that we just click on it. Here you can see the option is “timeline and tagging”.

Here you see that the number of different option but First we have to go on the first option which is “who can see your future post?” In this option, You can be specified who is allowed to see your future posts on Facebook, as we know that by default it is set to friends. However, you can edit this and you can make your future posts public, friends or you can also specified that you want to see it and except for certain friends then you should click on the “friends except for option” and then choose that friend that you don’t want to see your future posts or you can get more specific and only show your future posts to specific friends that you can choose or you can make it. So that it is set by default you are the only people that get to see our future posts unless otherwise specified.
As we know that if you are select on “Only me” option then no one can see your post excepting you. Only you can see your post. No one sees your future posts.
The next option in the list is to “Review all your posts and things you’re tagged in”. If you want to review all of the posts and items anyone has tagged in so if you want to keep with this. If you may be tagged in some photos and haven’t reviewed them then you could click on use activity log to review this photos and after that, you have to decide that whether or not should be posted on your Facebook account.

The Third option in the list is to “who can see your Facebook friend list?”. If you want, no one sees my friend list then you have to go on the dropdown list and select the option which is given. If you select Only Me option then only you can see your Facebook full friend list and the other user only can see your mutual friends.
The Fourth option in the list is to “limit the audience for posts you’ve shared”. This option allows you to limit the audience for our past posts so let say you have been using Facebook three years you’ve made some posts public, some private, some for friends, some for this some for that if you want to go back all at once and make all those posts just once for your friends then you need to click on limit past post and then you have to click on the button as displayed on your screen.
when you click on your option then the option will change all of your posts to friends so any public posts that you’ve made on your Facebook wallpaper or Facebook timeline will see by your friends so that’s a good way to really quickly go back and make sure that you have not been anything visible that you don’t want to other people to see.
Here the next option is "who can contact me? This option is so simple. Who can send you friend requests on Facebook that’s is very simply pretty self-explanatory? You could leave it so that anybody can send you a friend request or you could change to friends for a friend. But I suggest to you to select everyone option.

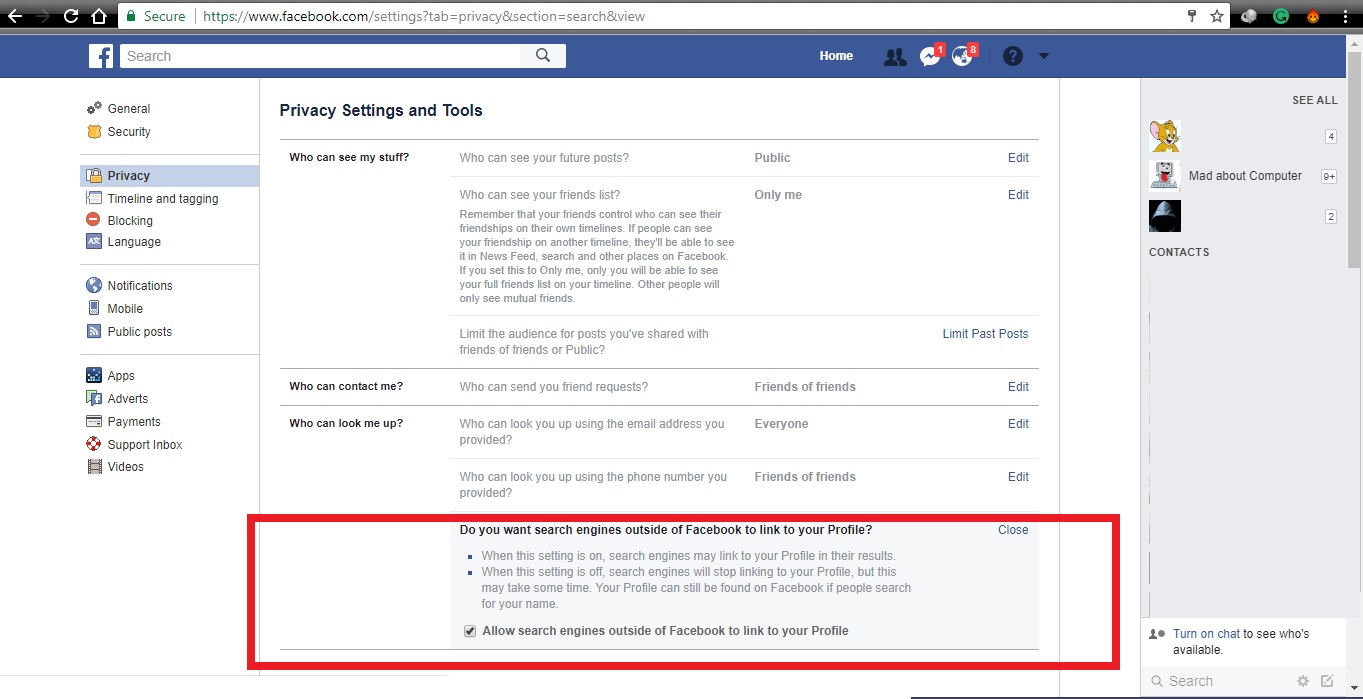
The next option is “who can look me up”. In this option, you can allow another user to who will able to see your email address to find you. I have mine set everyone but you can set as you want.
And the next option is “who can look up your number as you provided”. Here in this option, you can allow a user to who will able to see your mobile number as you provided to find you. It is very important for you. If you don’t want to display your number publicly then choose friends of a friend.
If you have found any mistake or doubt related this tutorial then let me know through your comment and also share to other computer or Facebook lovers. In the next tutorial, we will discuss more Facebook privacy settings.
Have a good day!!
People Also Read:- How to do Marketing with Facebook for Business?
People Also Read:- Increase Facebook Fan Page likes.